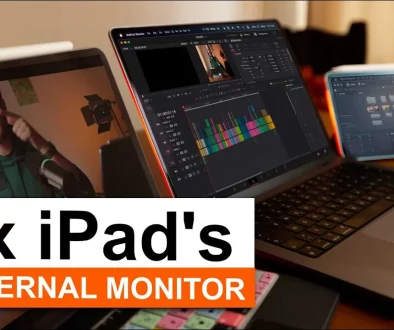
So nutzt du OBJEKT TRACKING in DaVinci Resolve iPad
In diesem Artikel/Video zeige ich dir den richtigen Weg, wie du Objektverfolgung (Object Tracking) in DaVinci Resolve für das iPad verwendest. Diese Methode ist diejenige, die tatsächlich auch am iPad funktioniert und in der aktuellen iPad-Version von DaVinci Resolve für das iPad nicht abstürzt. Es gibt viele Möglichkeiten in DaVinci Resolve, wie du Objekte verfolgen kannst. Ein gängiger Weg ist die Verwendung der Fusion Page Funktionen. Diese sind aber noch nicht so zuverlässig. In diesem Tutorial konzentrieren wir uns auf die Tracking-Funktionen der Color Page. Viel Spaß beim Lernen.
Pro Tipp: Mache deine Videos cinematisch (und spare eine Menge Zeit) mit unserem Seamless Transition Pack für DaVinci Resolve iPad.
Contents
- [Video] So nutzt du OBJEKT TRACKING in DaVinci Resolve iPad
- Wie öffnet man den Medienpool auf der Color Page?
- Methode 1: Verwendung der Objektverfolgung zum Einfügen eines Hintergrundvideos
- Schritt 1: Vergewissere dich, dass du deinen Clip ausgewählt hast, bevor du die Color Page öffnest.
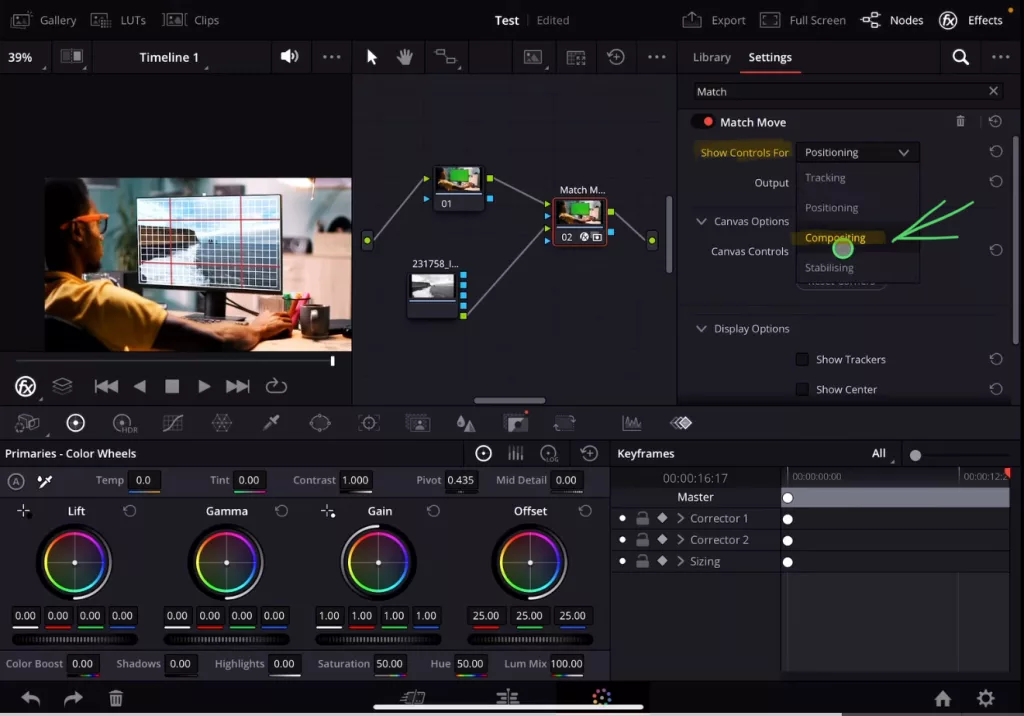
- Schritt 2: Hinzufügen des Effekts Match Move zum Node Tree
- Schritt 3: Ändere den Viewer-Modus auf „Open FX Overlay“.
- Schritt 4: Erstelle das 3-Punkte-Tracking
- Schritt 5: Verbinden eines Clips oder Bild mit dem Tracking
- Schritt 6: Wie kann ich Position und Größe des hinzugefügten Clips ändern?
- Methode 2: Verwendung der Objektverfolgung zum Einfügen eines transparenten Bildes
- Wenn du deinen eigenen Online-Kurs hosten möchtest, dann nimm CC360
- BONUS: Alle Teilnehmer der DaVinci Resolve iPad Masterclass erhalten das Transition Pack GRATIS!
[Video] So nutzt du OBJEKT TRACKING in DaVinci Resolve iPad
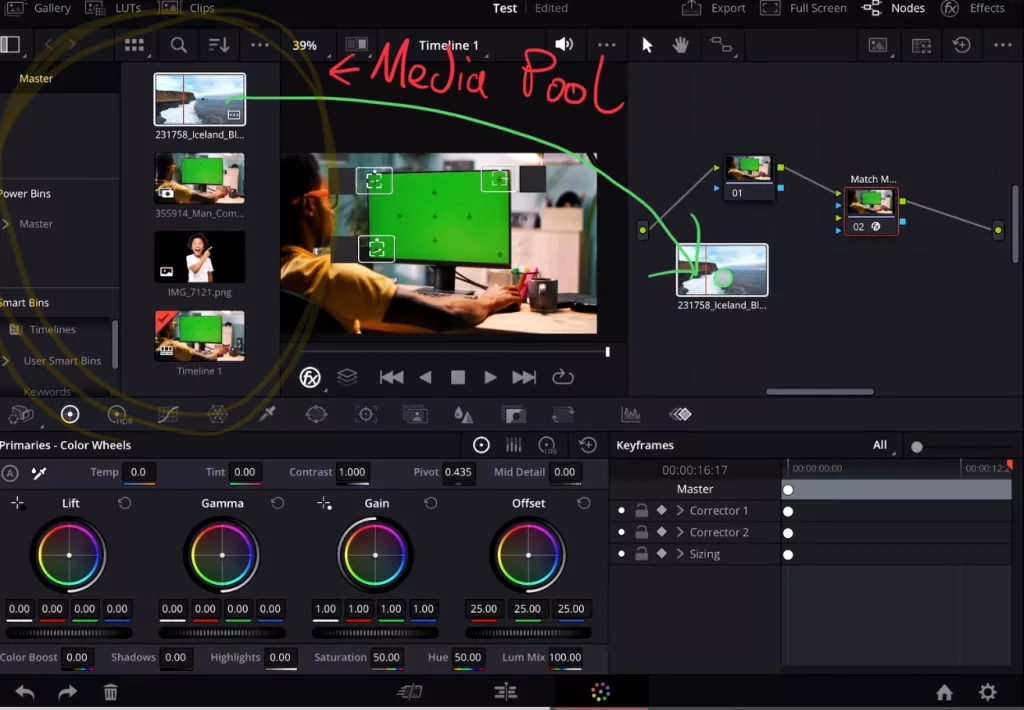
Wie öffnet man den Medienpool auf der Color Page?
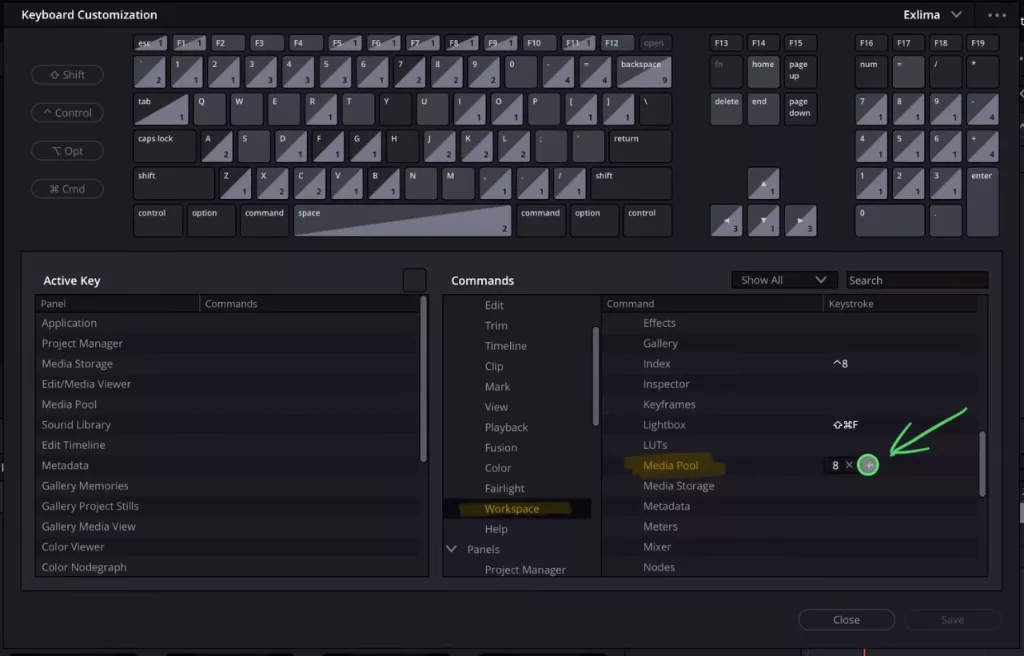
Warte Daniel, warum müssen wir dem Medienpool einen Shortcut geben? Ist der Medienpool nicht bereits auf der Schnitt- und der Bearbeitungsseite verfügbar? – Ja, da hast du Recht. Aber wir haben den Medienpool nicht auf der Color Page. Aber wenn du die Color Page in der Desktop-Version von DaVinci Resolve öffnest, kannst du auch dort den Medienpool öffnen. Und in diesem heutigen Tutorial werden wir die Möglichkeiten der Color Page nutzen, um damit Clips und Bilder zu koppeln. Außerdem zeige ich dir zwei Wege, wie du diese Methode des Trackings in DaVinci Resolve für das iPad nutzen kannst.
Methode 1: Verwendung der Objektverfolgung zum Einfügen eines Hintergrundvideos
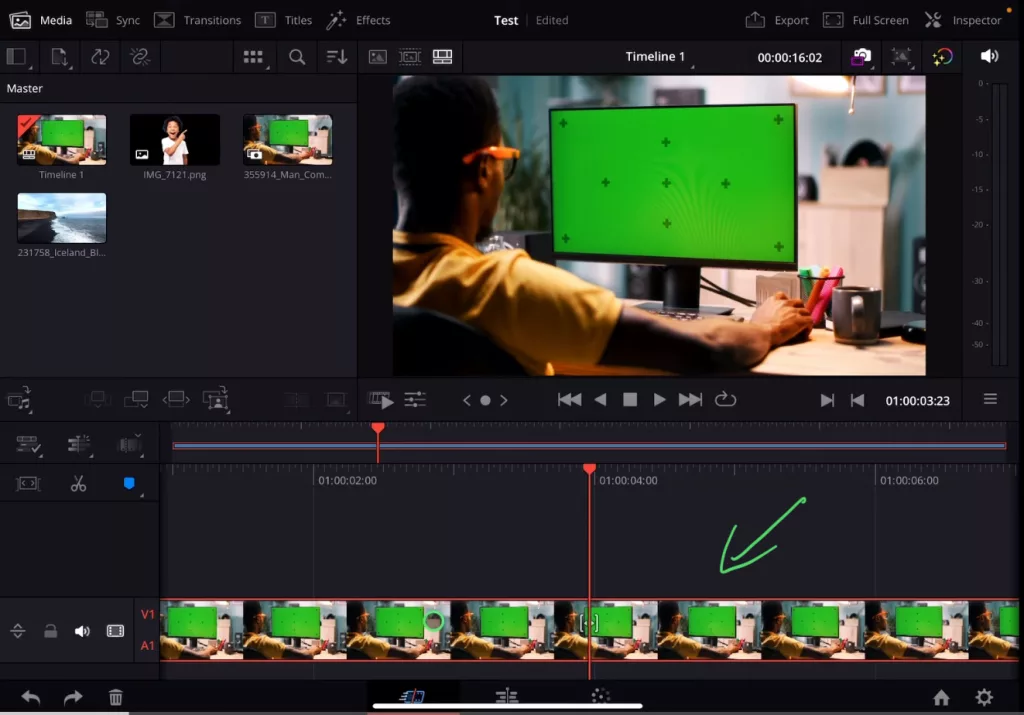
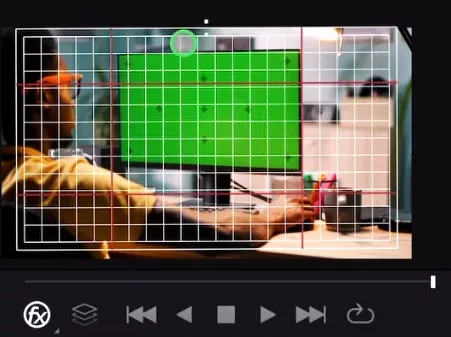
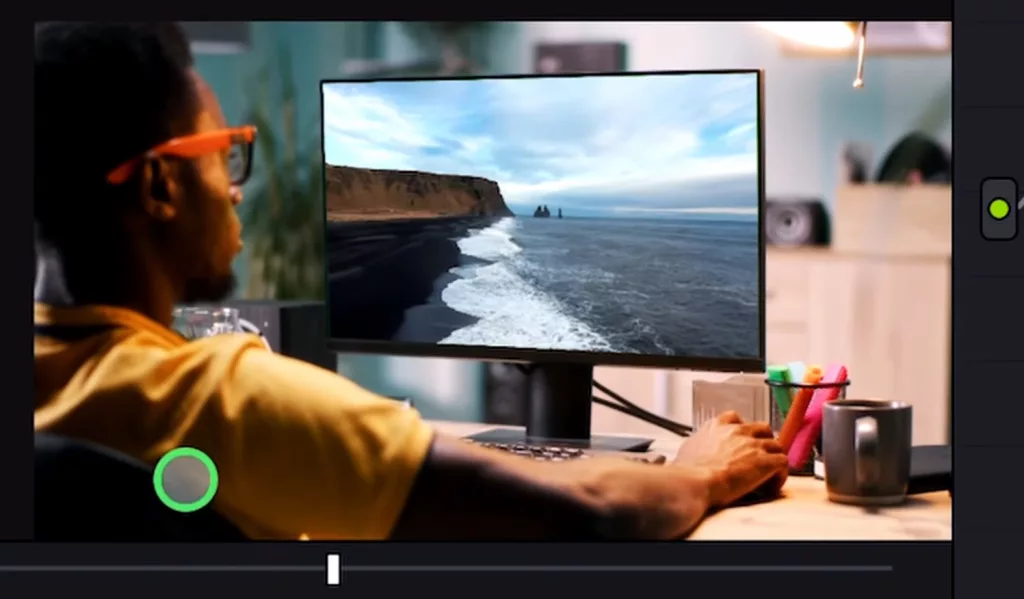
Bei dieser Methode werden wir die Bewegung eines Monitors in unseren Clips verfolgen, um den grünen Bildschirm des Monitors durch ein tatsächliches Hintergrundvideo zu ersetzen. Die Herausforderung? Der Monitor-Clip bewegt sich und wackelt. Wir müssen also einen Objektverfolgungseffekt verwenden.
Schritt 1: Vergewissere dich, dass du deinen Clip ausgewählt hast, bevor du die Color Page öffnest.
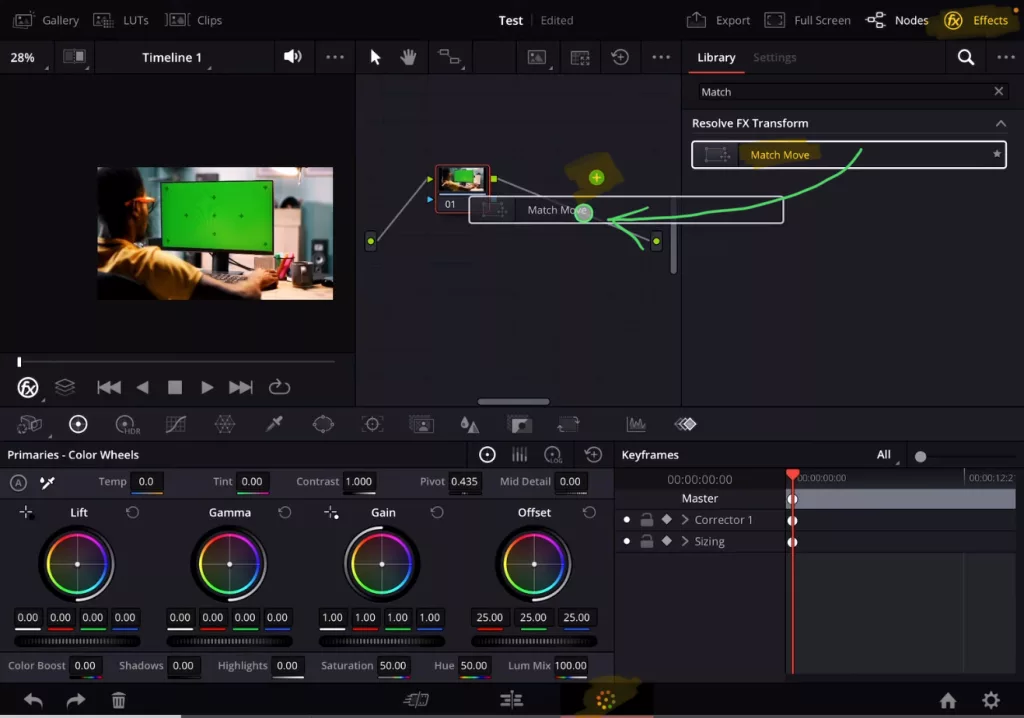
Schritt 2: Hinzufügen des Effekts Match Move zum Node Tree
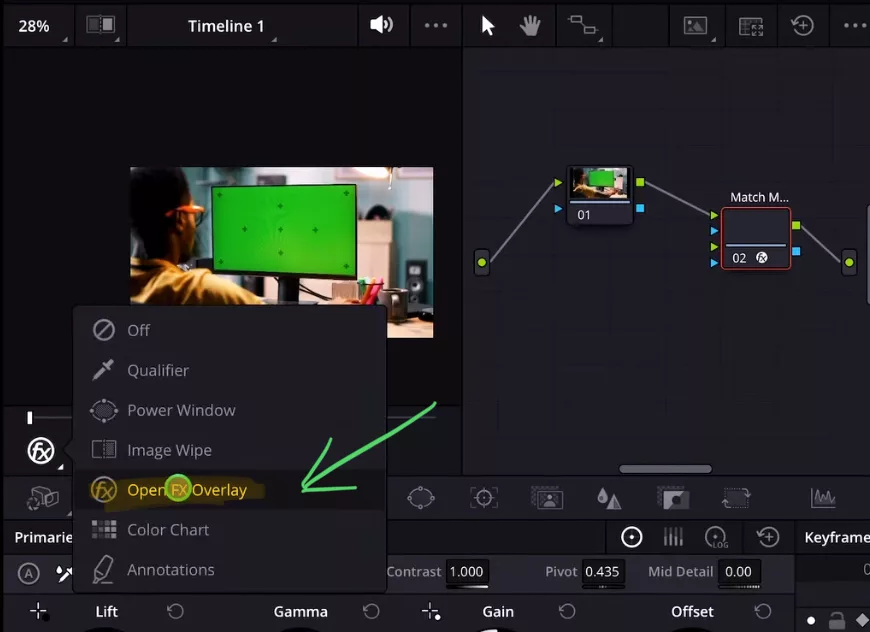
Schritt 3: Ändere den Viewer-Modus auf „Open FX Overlay“.
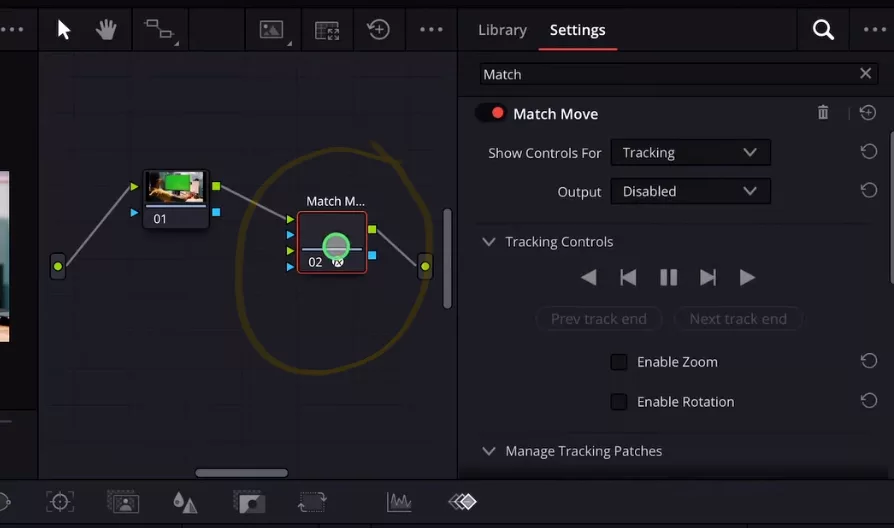
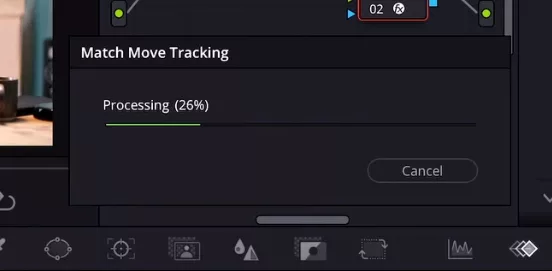
Schritt 4: Erstelle das 3-Punkte-Tracking

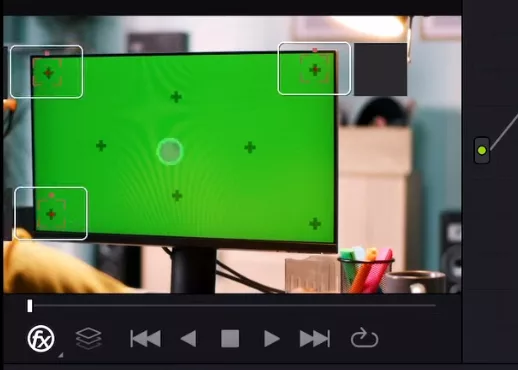
Tipp: Um ein optimales Ergebnis beim Tracking zu erzielen, solltest du darauf achten, dass du Punkte mit einem hohen Kontrastniveau im Punktbereich wählst.
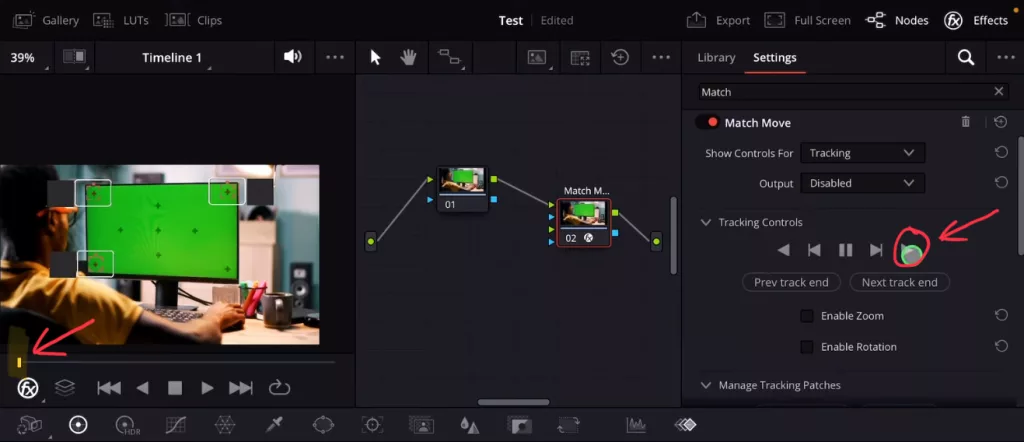
Tipp: Wenn deine Clip-Abspielposition am absoluten Ende liegt, musst du nur Rückwärts-Tracken. Wenn deine Clip-Abspielposition irgendwo dazwischen liegt, musst du zuerst in eine Richtung (z. B. vorwärts) und dann wieder in die andere Richtung (z. B. rückwärts) Tracken.
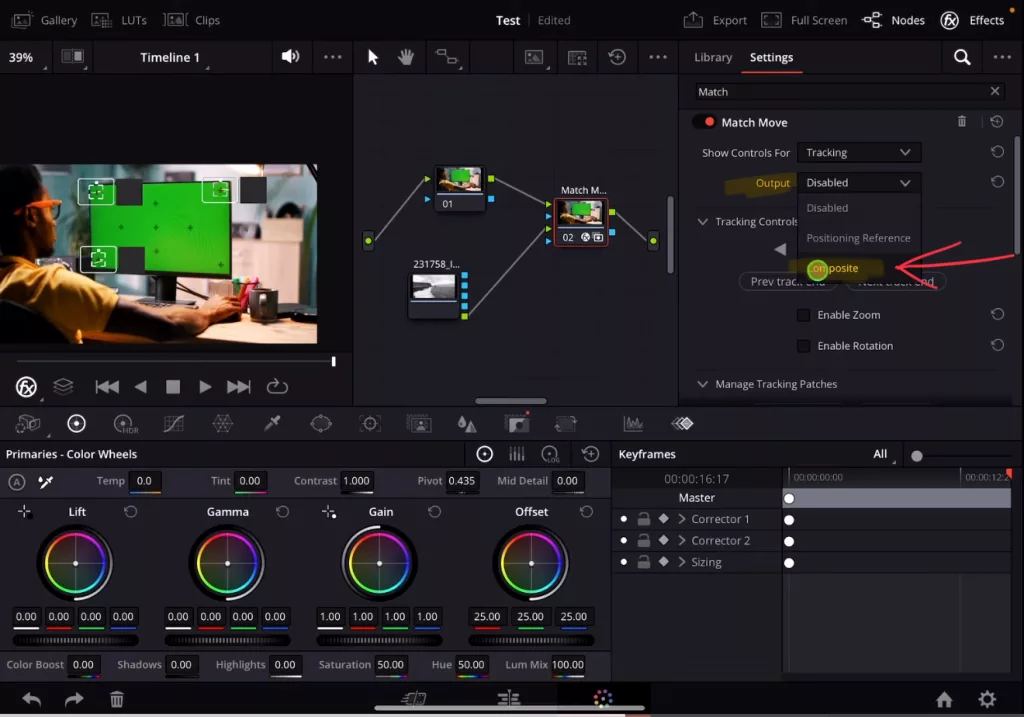
Schritt 5: Verbinden eines Clips oder Bild mit dem Tracking
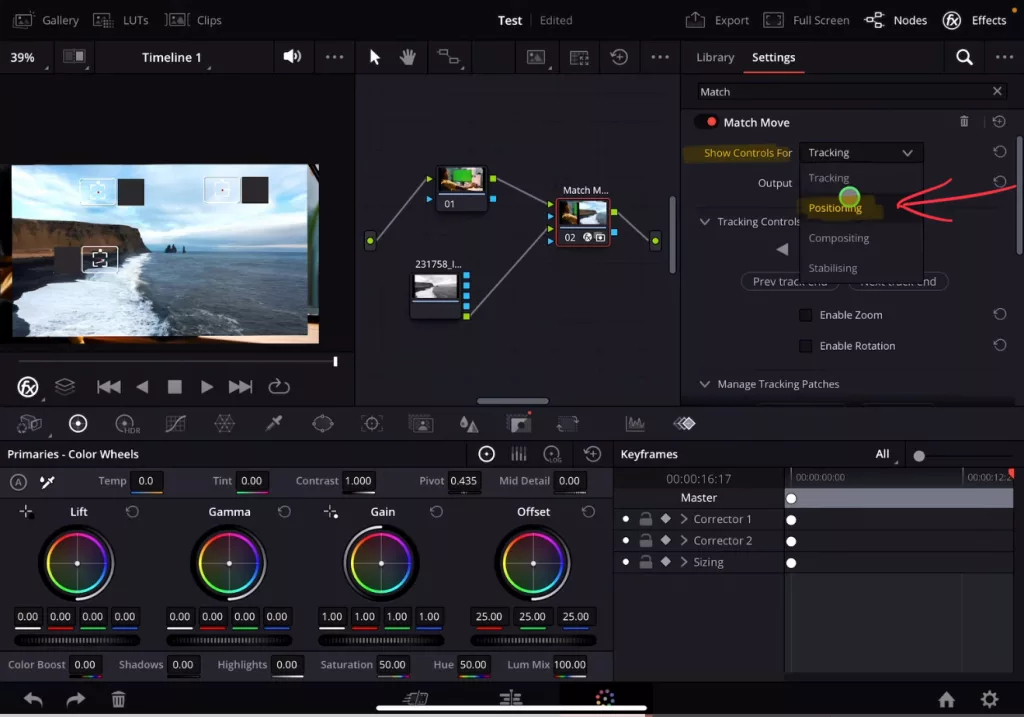
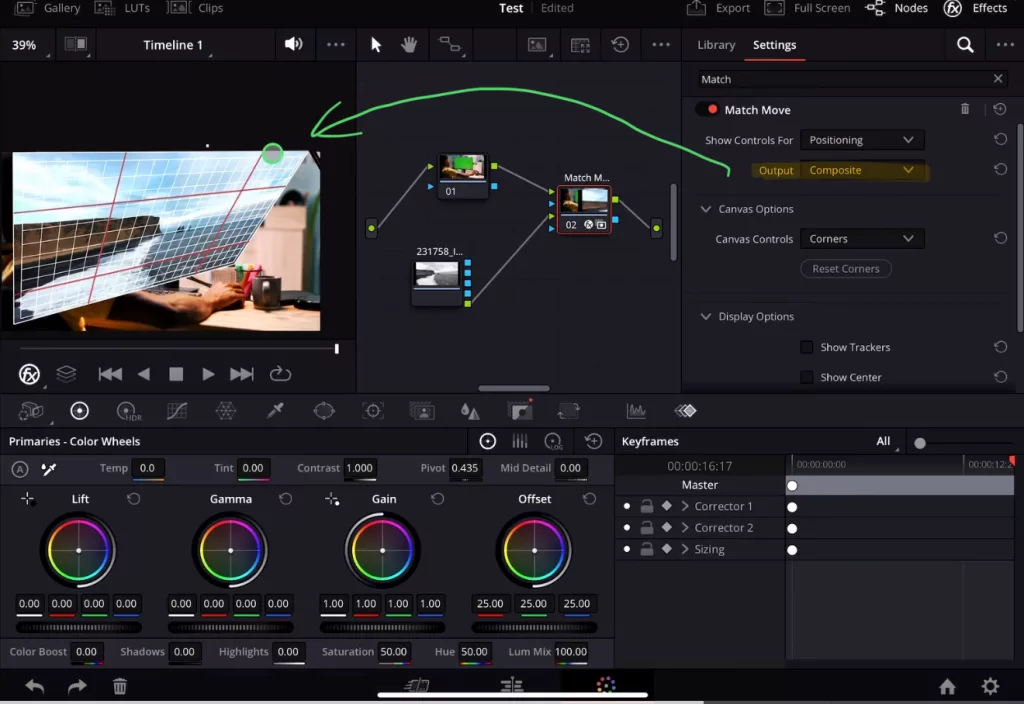
Schritt 6: Wie kann ich Position und Größe des hinzugefügten Clips ändern?

Methode 2: Verwendung der Objektverfolgung zum Einfügen eines transparenten Bildes
Was, wenn wir ein Bild mit transparentem Hintergrund hinzufügen wollen?
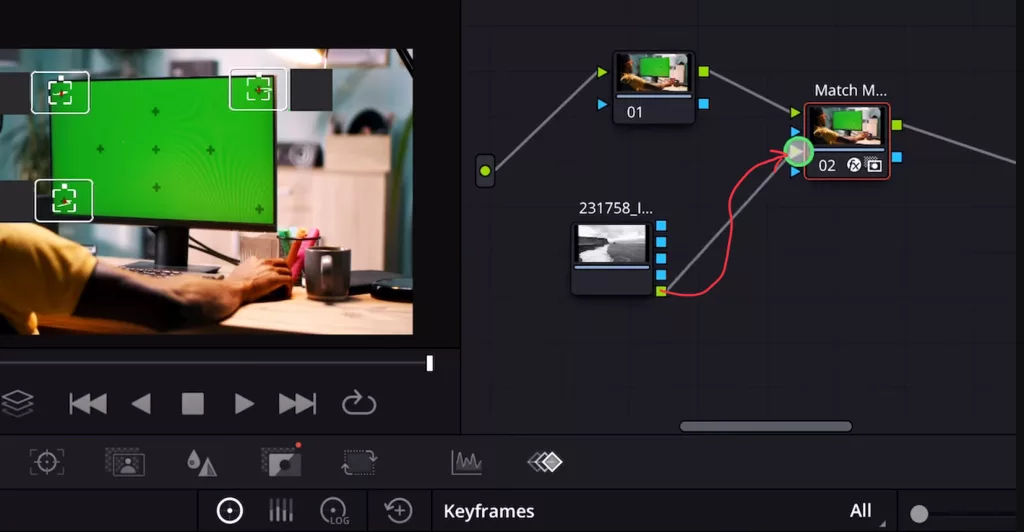
Schritt 1: Öffne den Medienpool und ziehe das Bild per Drag & Drop in die Node Ansicht
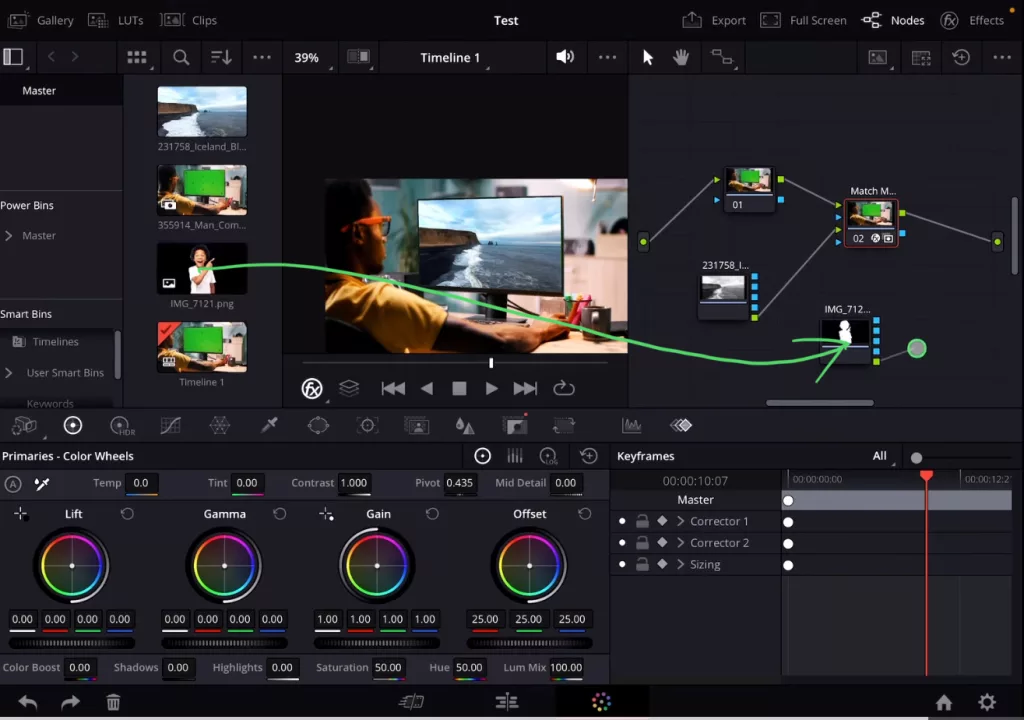
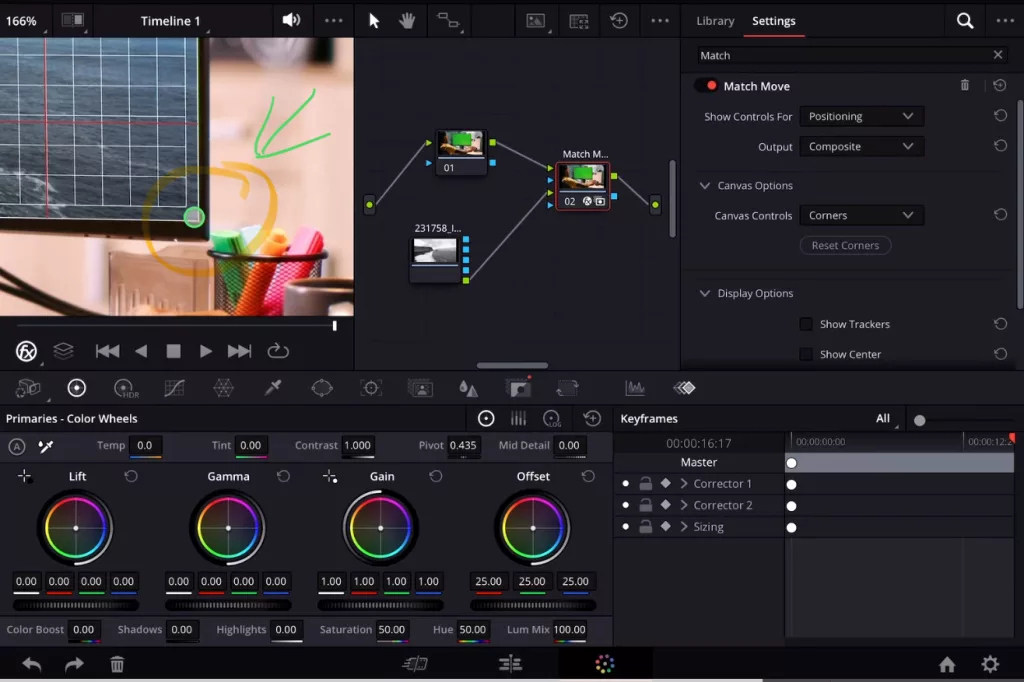
Schritt 2: Verbinde die Ausgangspunkte mit den Eingangspunkten des Match-Movement-Node
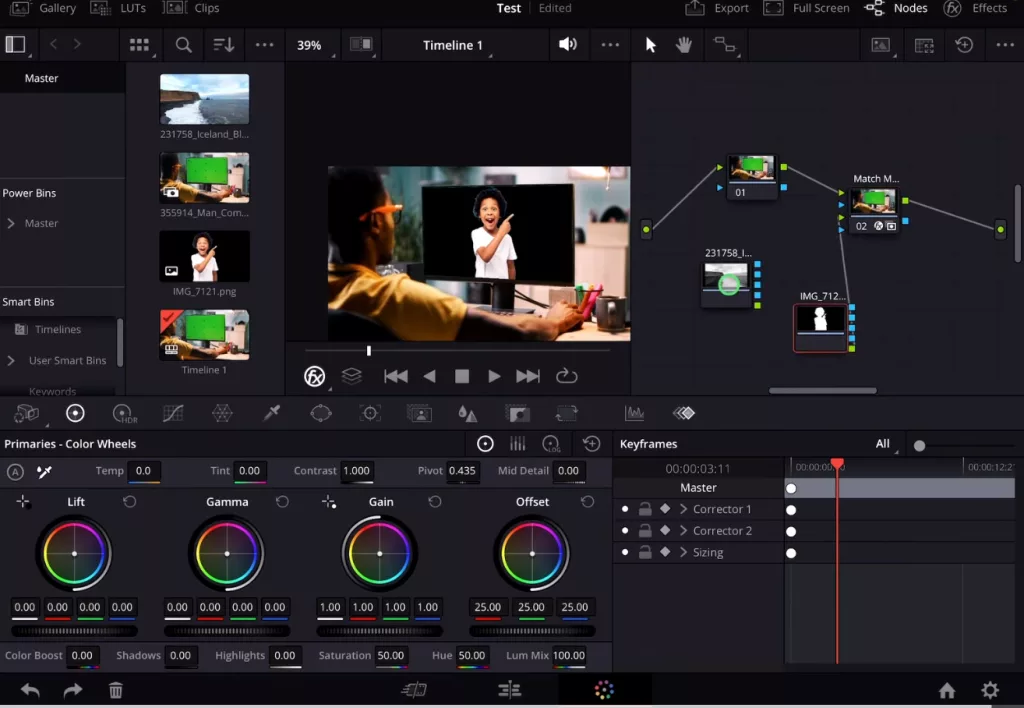
Um den schwarzen Hintergrund unseres Bildes zu entfernen, müssen wir noch zwei weitere Punkte verbinden:
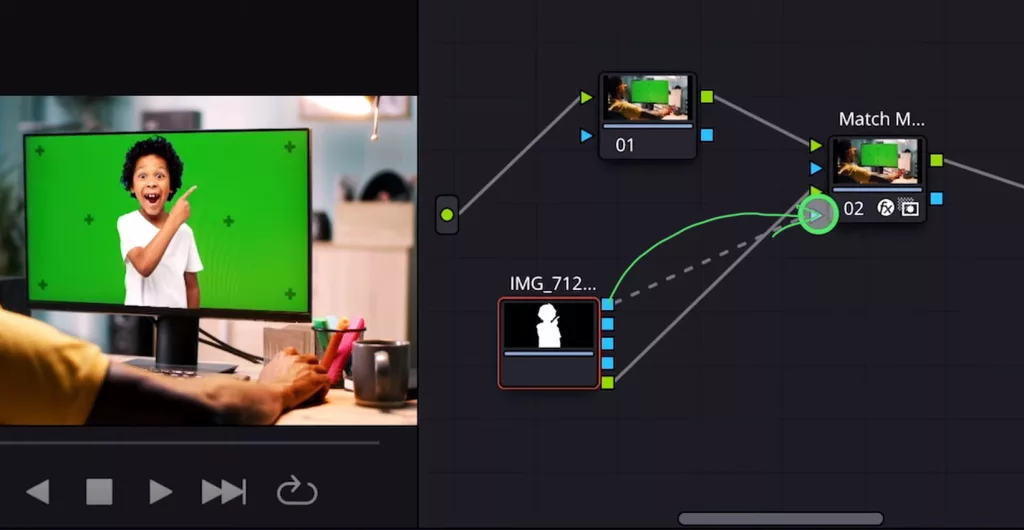
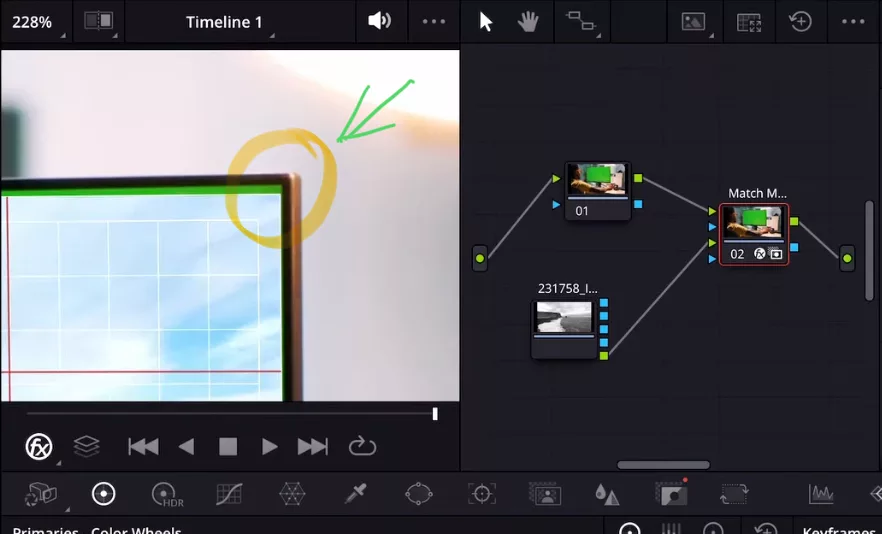
Schritt 3: Wie kann ich die Position und Größe des transparenten Bildes ändern?

Das Tolle an dem, was wir gerade erstellt haben, ist, dass man das Object Tracking nicht noch einmal machen muss. Denn es wird auf den Match-Movement-Node angewendet. Alles, was ich mit diesem Node verbinde, erhält das Tracking. Aus diesem Grund bewegt sich das neue transparente Bild bereits mit der Bewegung unseres Clips. Fertig 🙂
Tipp: Wenn du nicht weißt, wie du die anderen Pages auf dem iPad bekommst, ließ zuerst diesen Artikel: Alle Funktionen in DaVinci Resolve fürs iPad freischalten? (So geht’s)
Wenn du deinen eigenen Online-Kurs hosten möchtest, dann nimm CC360
Ich glaube wirklich, dass CC360 die beste Plattform ist, um Online-Kurse zu hosten. Schau einfach mal selbst nach hier.
BONUS: Alle Teilnehmer der DaVinci Resolve iPad Masterclass erhalten das Transition Pack GRATIS!
Du kannst das Transition Pack entweder separat hier erwerben: Seamless Transition Pack für DaVinci Resolve iPad. Oder alle unsere DaVinci Resolve iPad Packs sind ein GRATIS Bonus für die DaVinci Resolve iPad Masterclass Kursteilnehmer.
Schau dir hier die DaVinci Resolve iPad MasterClass an: Vom Beginner zum Pro.
Das könnte dich auch interessieren:
• Wie du iPhone HDR Videos bearbeitest in DaVinci Resolve iPad
• Screenshot von der Timeline (DaVinci Resolve iPad)
• Der Vergleich: DaVinci Resolve iPad Studio oder kostenlos?
• So synchronisierst du Audio & Video in DaVinci Resolve fürs iPad
• Top 3 Möglichkeiten Geschwindigkeit eines Clips ändern in DaVinci Resolve iPad

Videos auf dem iPad schneiden – das kann einfacher sein, als du denkst.
Ich bin Daniel – Filmemacher, Kursleiter und digitaler Nomade. Ich habe Final Cut Pro und DaVinci Resolve auf dem iPad intensiv in echten Projekten getestet – und zeige dir Schritt für Schritt, wie du das auch kannst. Ohne Technik-Frust. Ohne komplizierte Fachbegriffe.
Meine DaVinci Resolve iPad MasterClass und Final Cut Pro iPad MasterClass haben schon hunderten Anfängern geholfen – auch denen, die vorher noch nie geschnitten haben.