Pro Video Cutter zeigt GEHEIMEN Workflow in DaVinci Resolve iPad
In diesem Artikel zeige ich dir, wie professionelle Video-Editoren die Power Bins Funktion in DaVinci Resolve für iPad richtig nutzen. Ich habe bereits einen Artikel verfasst, in dem ich erkläre, was Power Bins sind. Wenn du eine Auffrischung willst, ließ diesen Artikel hier zuerst. Ich werde dir auch einen kurzen Überblick geben und dann gleich mit einigen fortgeschrittenen Techniken beginnen, was du mit Power Bins tatsächlich alles tun kannst. Diese Hacks werden dich um einiges schneller machen als der Rest der Video Cutter da draußen. Viel Spaß und ich hoffe, dass du etwas lernst. 🙂
Pro Tipp: Mache deine Videos cinematisch (und spare eine Menge Zeit) mit unserem Seamless Transition Pack für DaVinci Resolve iPad.
Contents
- [Video] PRO EDITOR ZEIGT GEHEIMEN WORKFLOW in DaVinci!
- Was sind Power Bins?
- Fortgeschrittener Power Bin Hack #1: Einstellungen für Position und Skalierung
- Fortgeschrittener Power Bin Hack #2: Lautstärke von Soundeffekten (SFX), Marker, Keyframes und In- & Out-Punkte
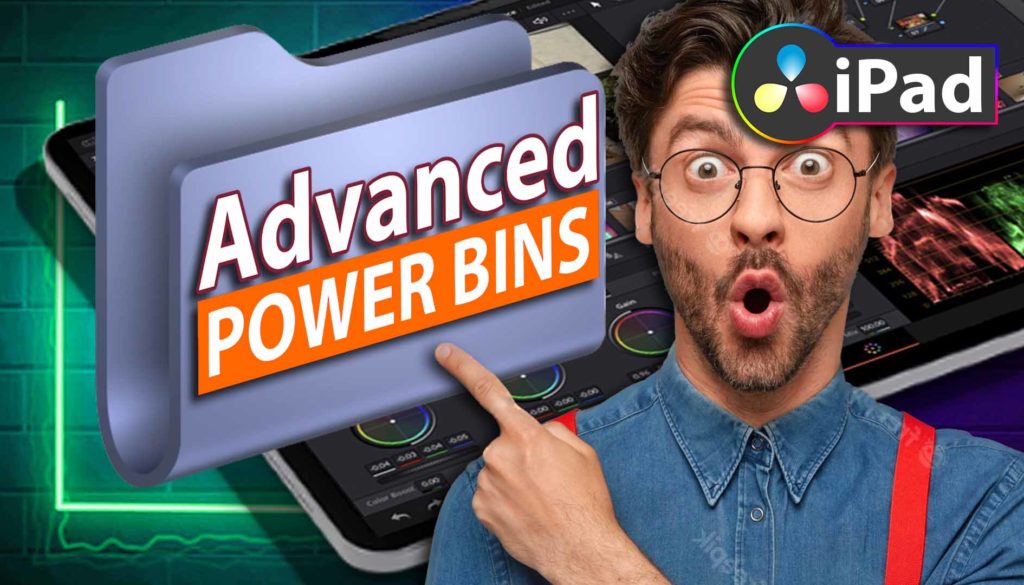
- Advanced Power Bin Hack #3: Film Grain VFX and Overlays
- Wenn du deinen eigenen Online-Kurs hosten möchtest, dann nimm CC360
- BONUS: Alle Teilnehmer der DaVinci Resolve iPad Masterclass erhalten das Transition Pack GRATIS!
[Video] PRO EDITOR ZEIGT GEHEIMEN WORKFLOW in DaVinci!
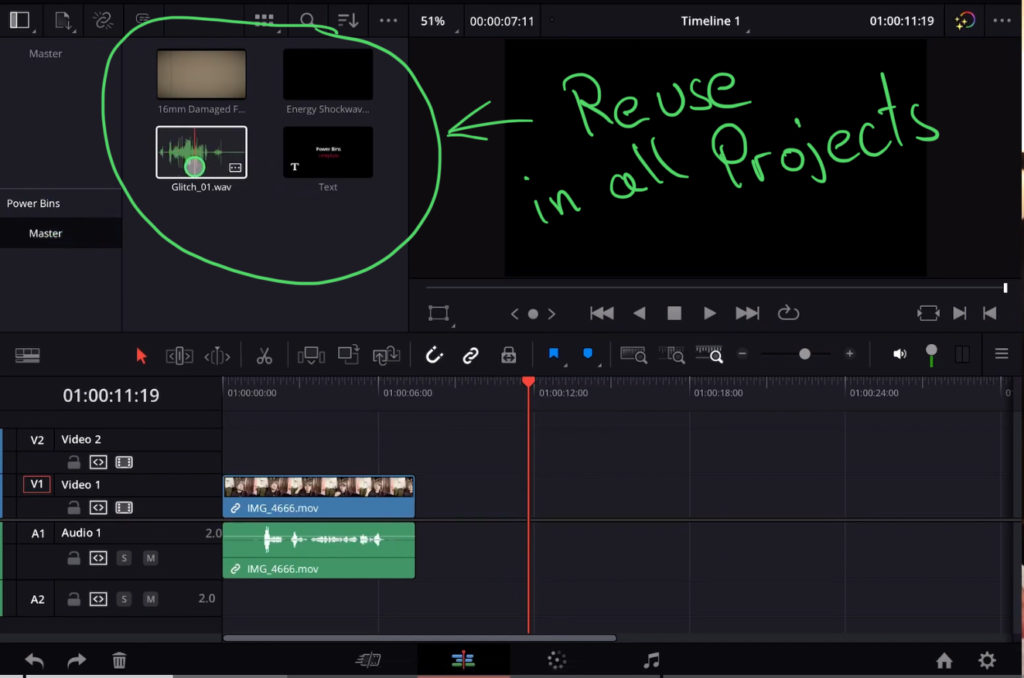
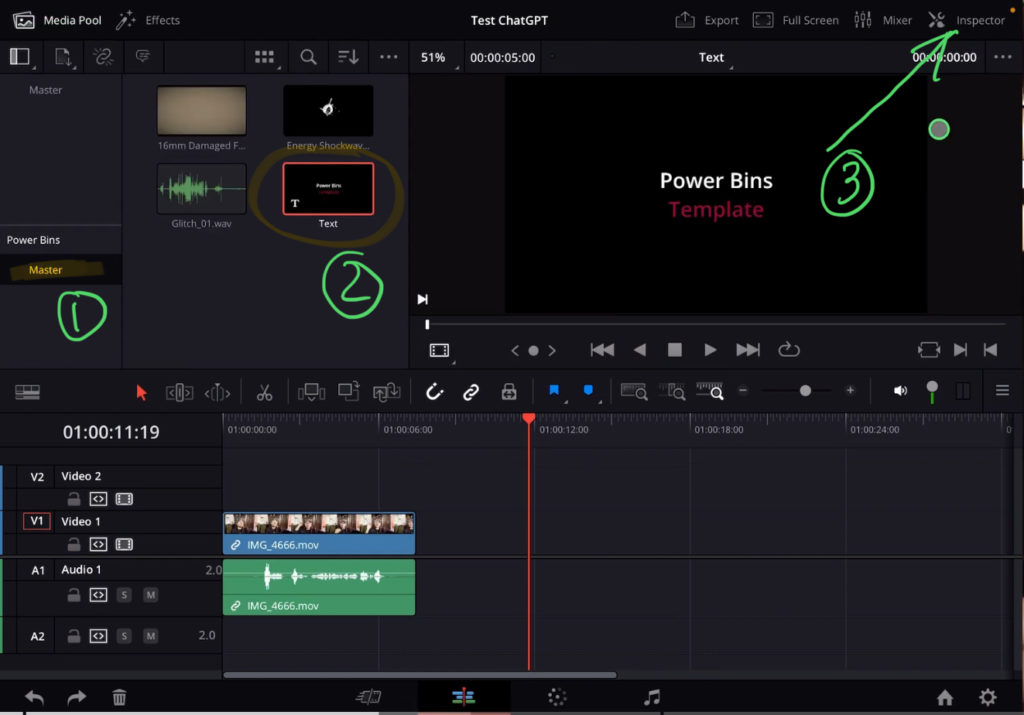
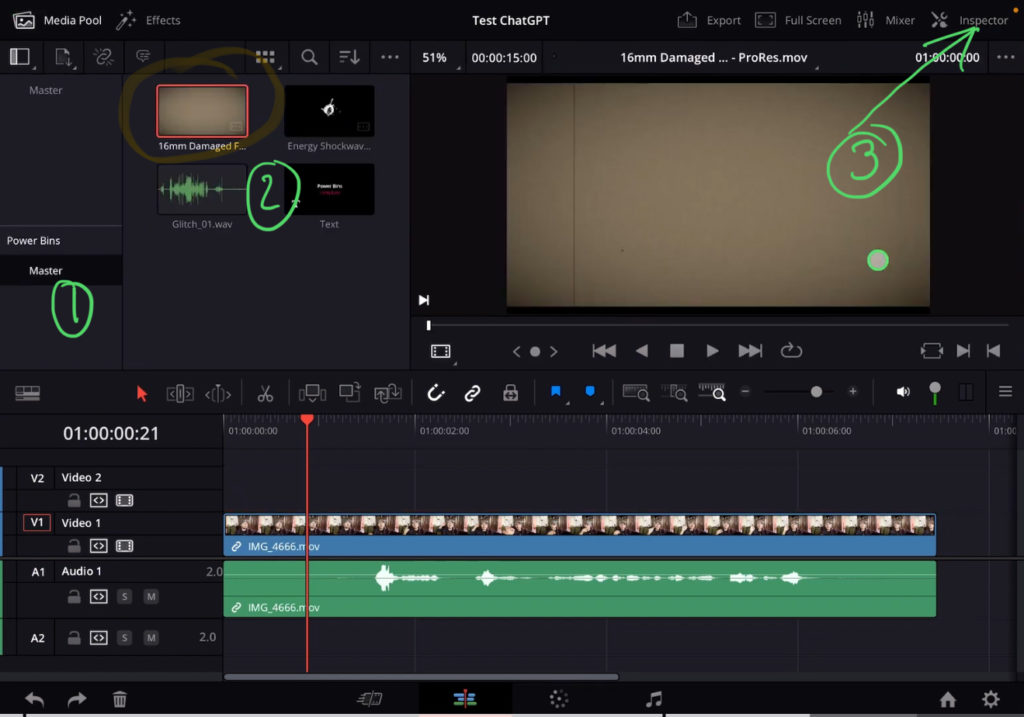
Was sind Power Bins?
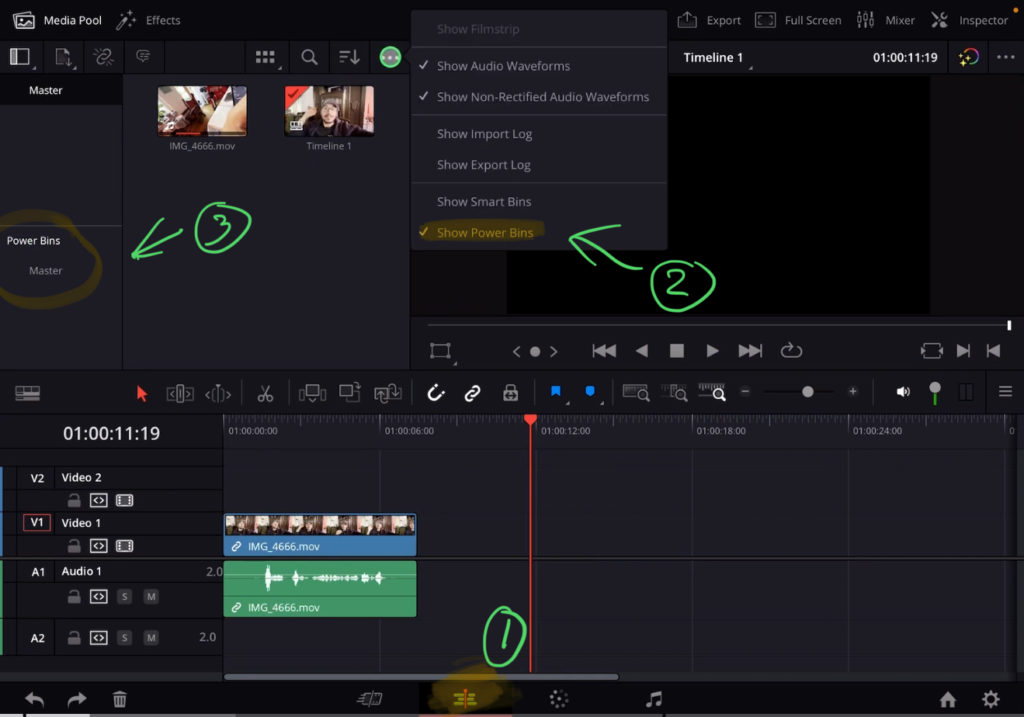
Tipp: Wenn du nicht weißt, wie du die anderen Pages auf dem iPad bekommst, ließ zuerst diesen Artikel: Alle Funktionen in DaVinci Resolve fürs iPad freischalten? (So geht’s)
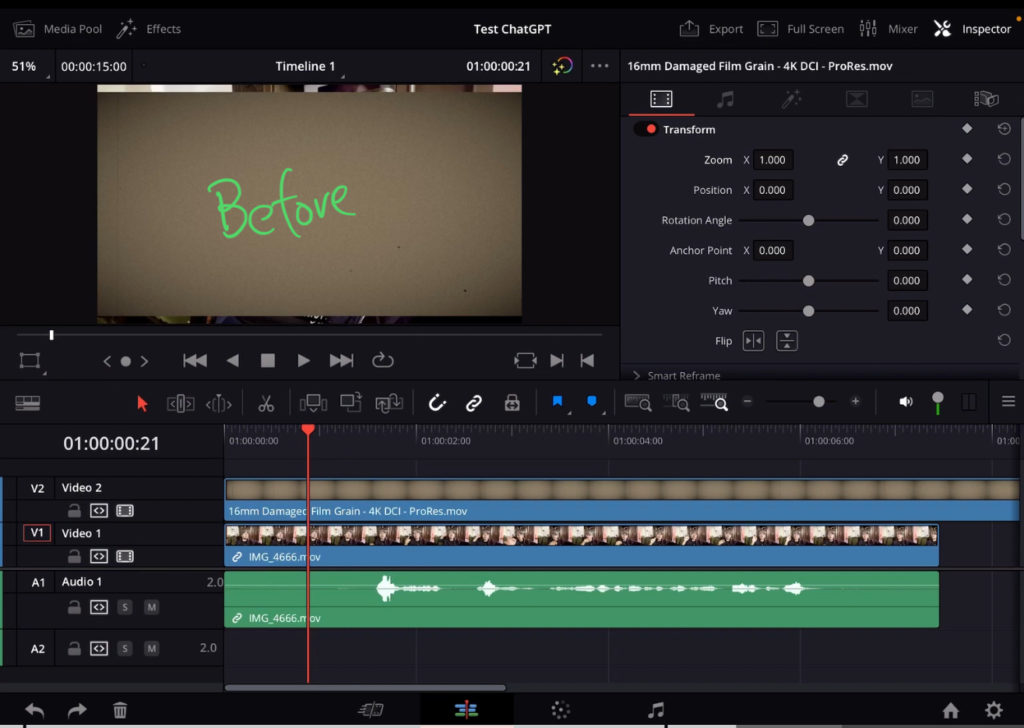
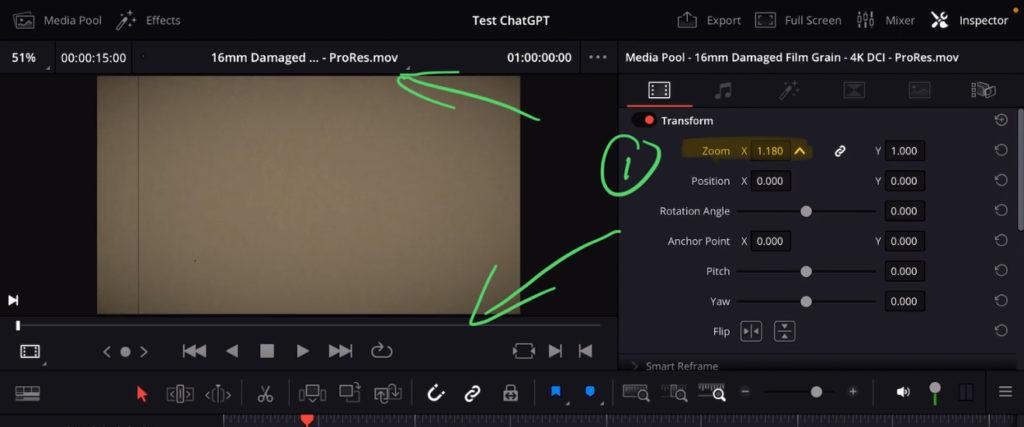
Fortgeschrittener Power Bin Hack #1: Einstellungen für Position und Skalierung
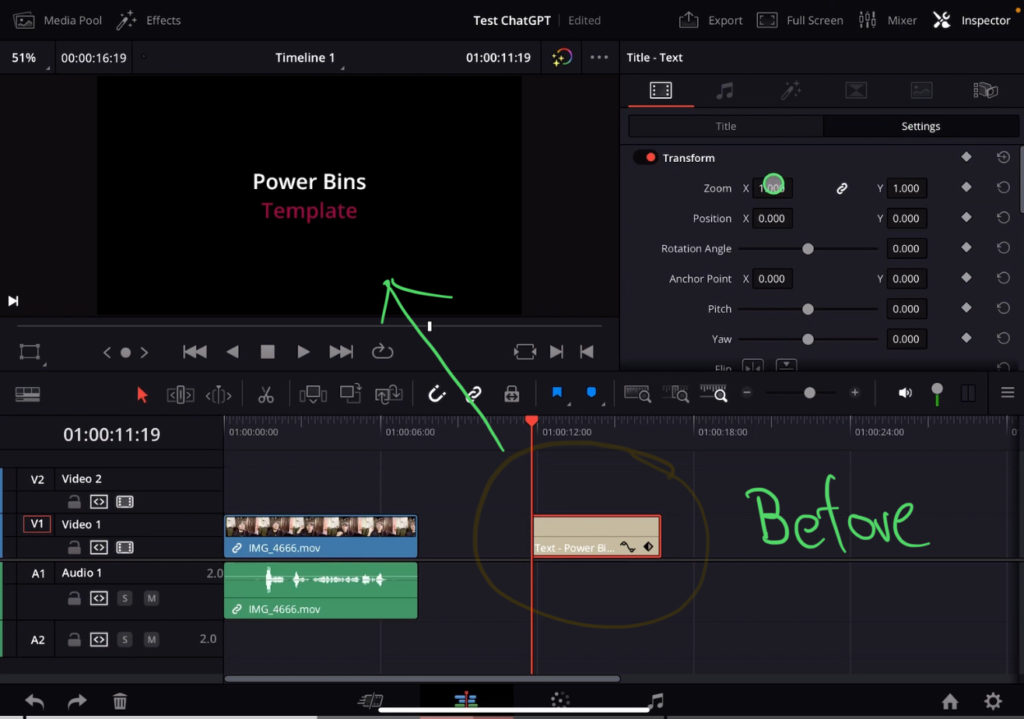
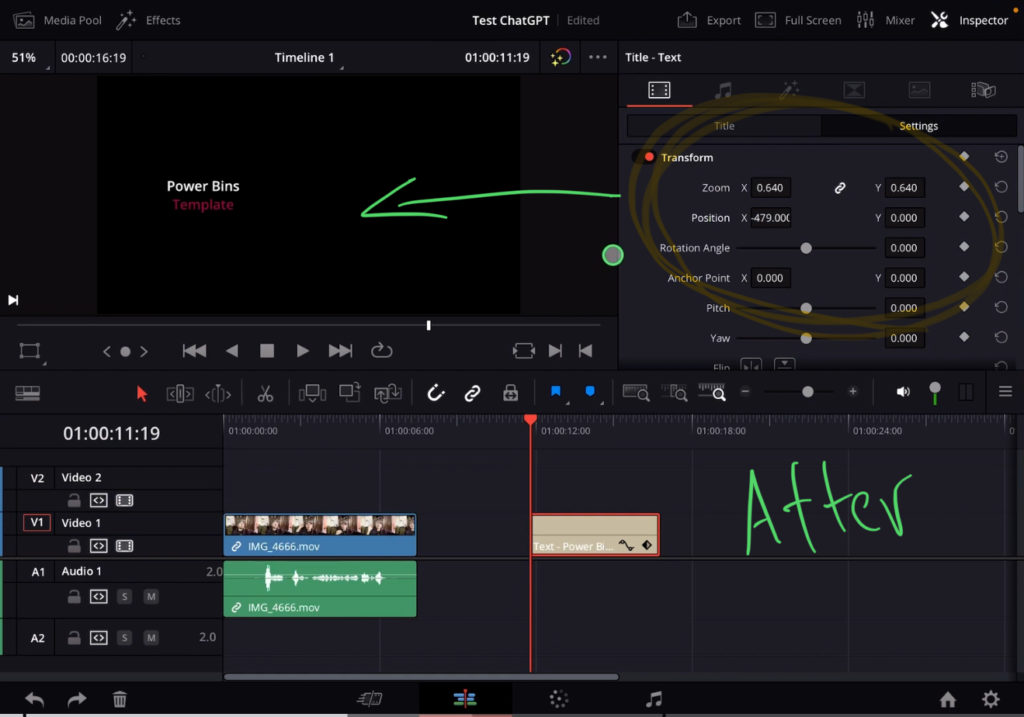
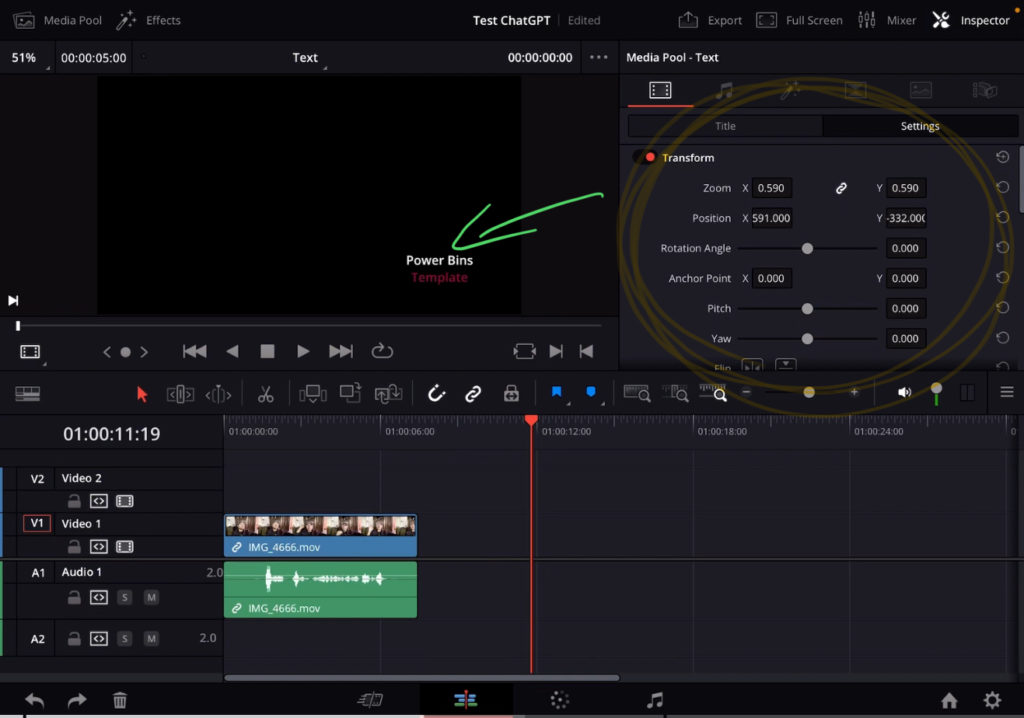
Tipp: Was, wenn du dasselbe Logo (Text) wiederverwenden möchtest, aber mit anderen Einstellungen und Positionen? Dupliziere einfach den Clip im Power Bin und nehm die Änderungen am Duplikat vor. Gib jedem Clip einen Namen, damit du dir merken kannst, um welches es sich handelt. Zum Beispiel „Logo 1 – Oben links“ und „Logo 1 – Unten rechts“.
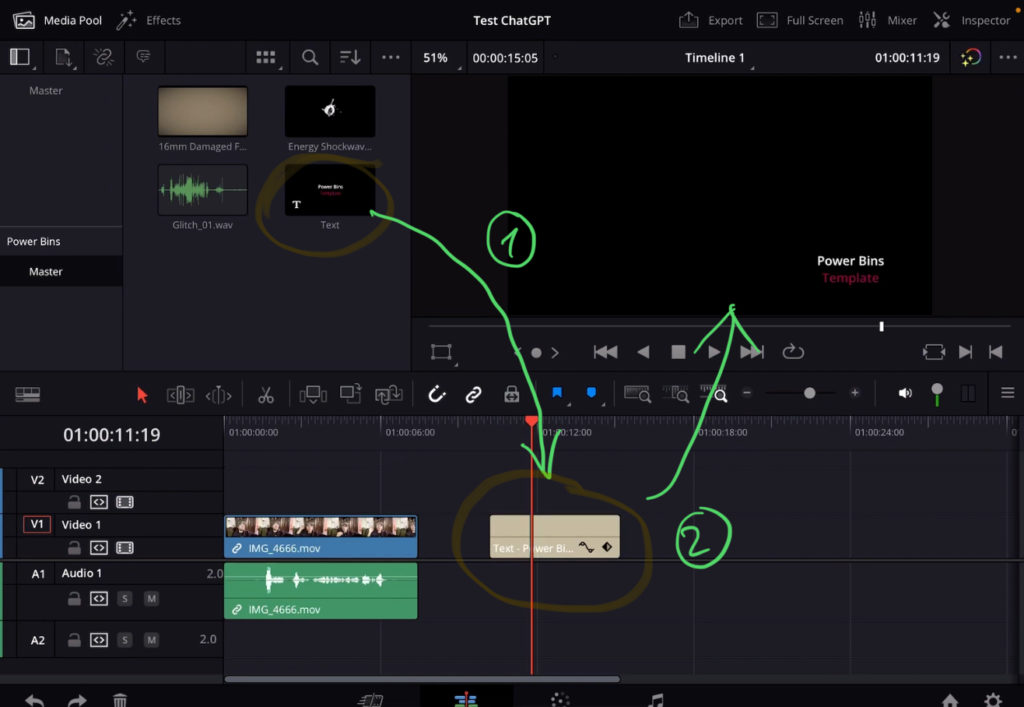
Fortgeschrittener Power Bin Hack #2: Lautstärke von Soundeffekten (SFX), Marker, Keyframes und In- & Out-Punkte
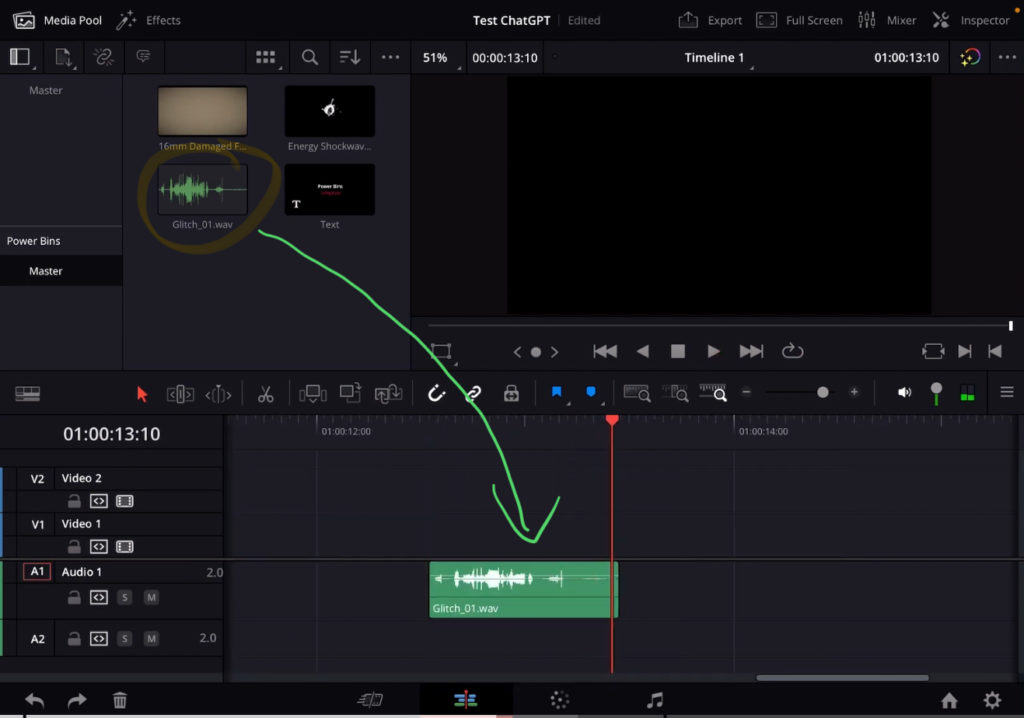
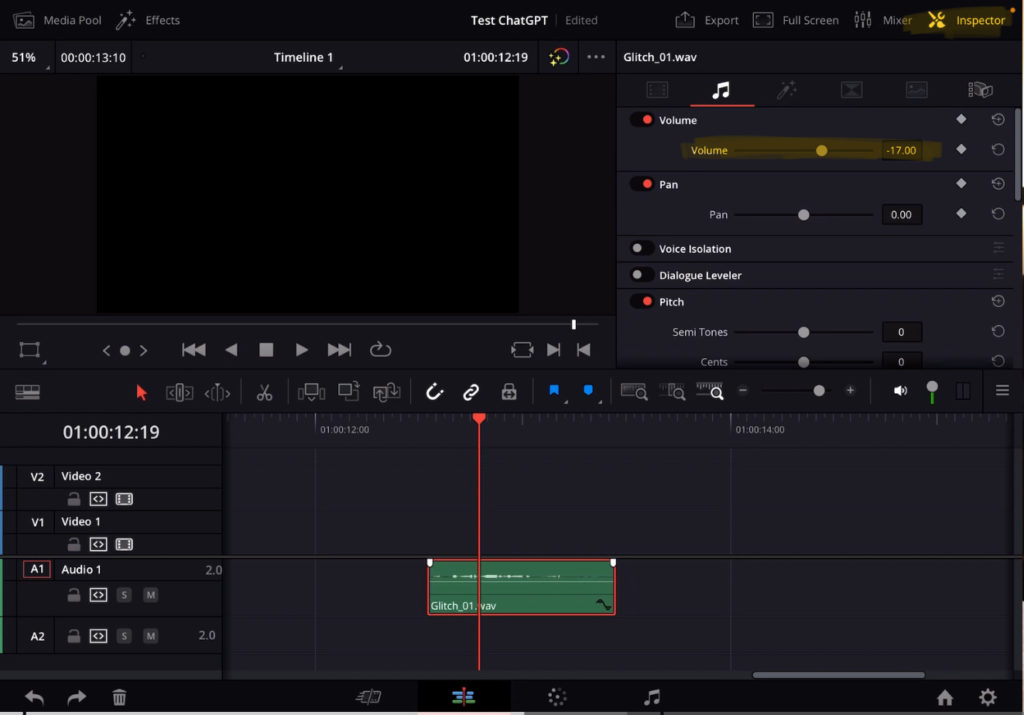
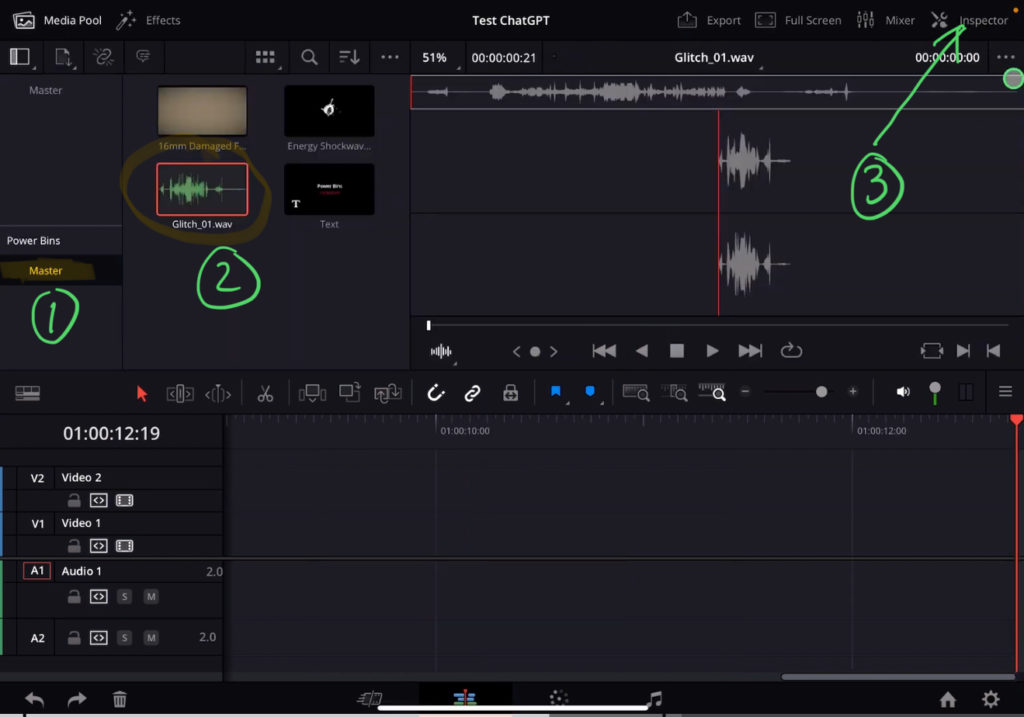
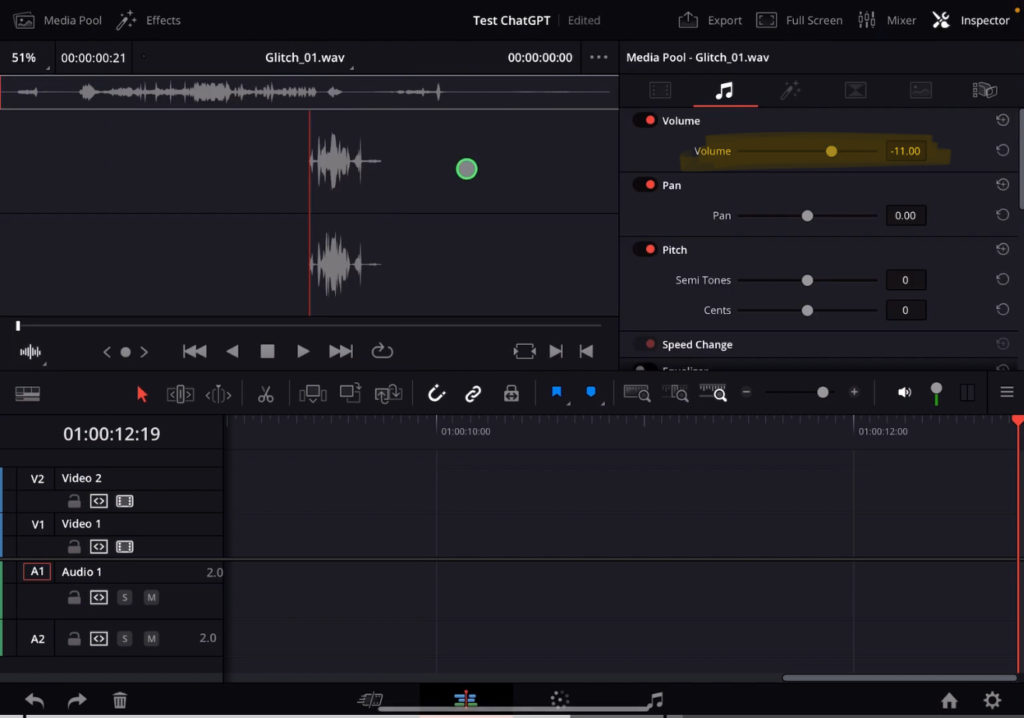
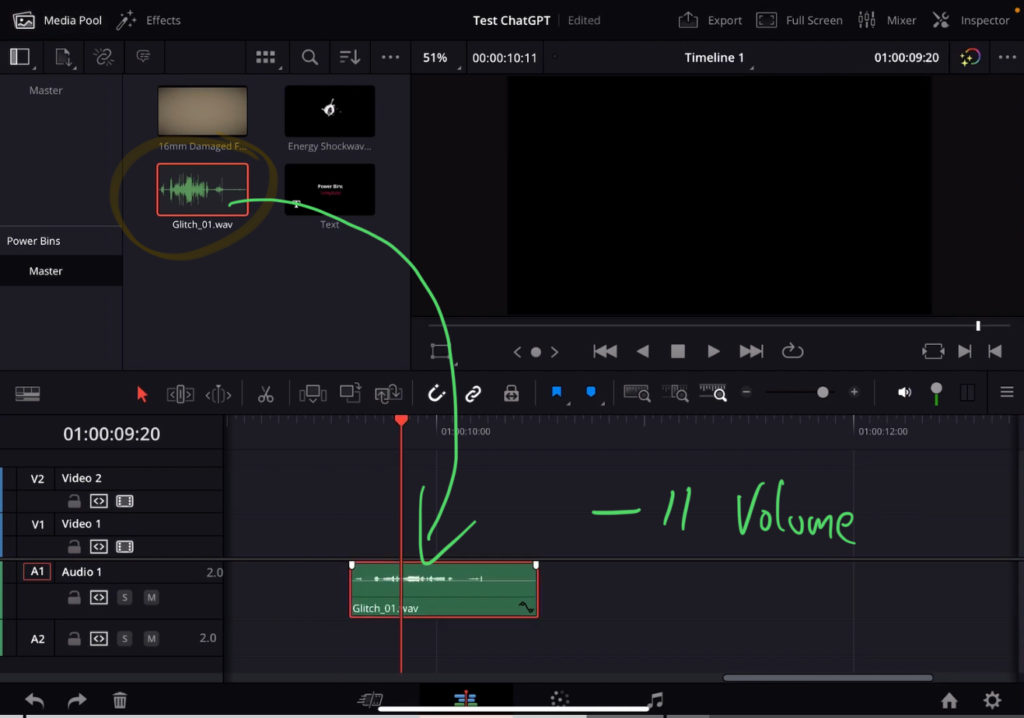
Tipp: Du kannst auch Marker verwenden, die In- und Out-Points ändern und Keyframes zu diesen Clips hinzufügen.
 ✩✩✩ Erstelle Animationen wie in Marvel Filmen mit diesen einfachen Drag & Drop VFX PackSuperhero FX von BigFilms.
Advanced Power Bin Hack #3: Film Grain VFX and Overlays

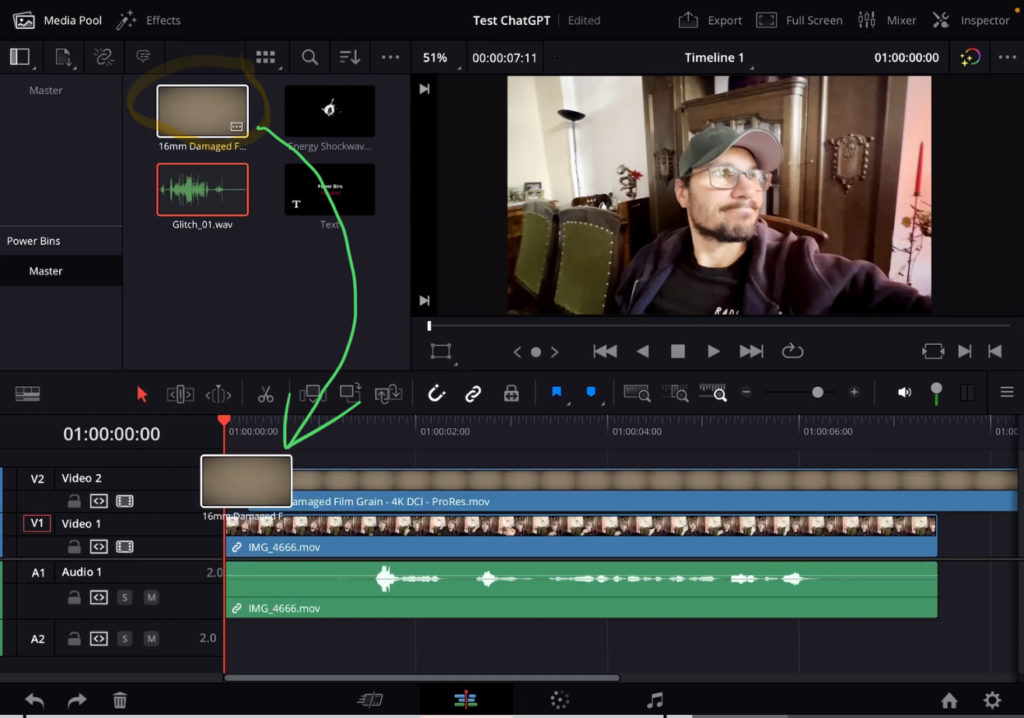

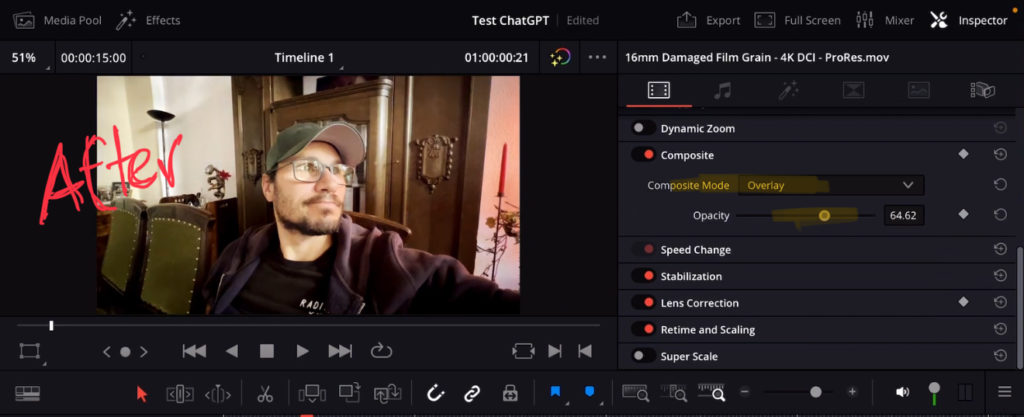
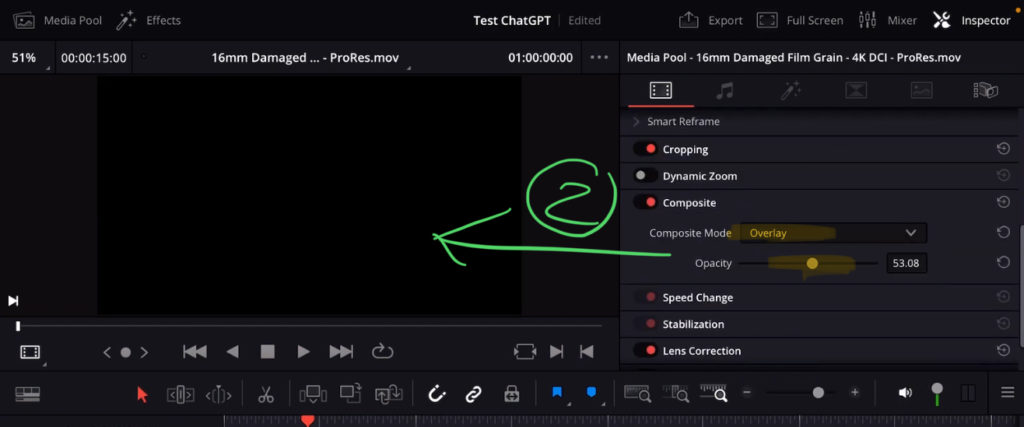

Tipp: Du kannst alles, was im Inspektor verfügbar ist, auch in einem Power Bin Clip speichern. Das bedeutet, dass du deiine Bearbeitungsgeschwindigkeit mit all diesen benutzerdefinierten Vorlagen drastisch erhöhen kannst. Außerdem sind deine Möglichkeiten nur durch deine eigenen Ideen begrenzt. Nutze also diese Power Bins Advanced Hacks!
Wenn du deinen eigenen Online-Kurs hosten möchtest, dann nimm CC360
Ich glaube wirklich, dass CC360 die beste Plattform ist, um Online-Kurse zu hosten. Schau einfach mal selbst nach hier.
BONUS: Alle Teilnehmer der DaVinci Resolve iPad Masterclass erhalten das Transition Pack GRATIS!
Du kannst das Transition Pack entweder separat hier erwerben: Seamless Transition Pack für DaVinci Resolve iPad. Oder alle unsere DaVinci Resolve iPad Packs sind ein GRATIS Bonus für die DaVinci Resolve iPad Masterclass Kursteilnehmer.
Schau dir hier die DaVinci Resolve iPad MasterClass an: Vom Beginner zum Pro.
Das könnte dich auch interessieren:
• Wie du iPhone HDR Videos bearbeitest in DaVinci Resolve iPad
• Screenshot von der Timeline (DaVinci Resolve iPad)
• Der Vergleich: DaVinci Resolve iPad Studio oder kostenlos?
• So synchronisierst du Audio & Video in DaVinci Resolve fürs iPad
• Top 3 Möglichkeiten Geschwindigkeit eines Clips ändern in DaVinci Resolve iPad

Videos auf dem iPad schneiden – das kann einfacher sein, als du denkst.
Ich bin Daniel – Filmemacher, Kursleiter und digitaler Nomade. Ich habe Final Cut Pro und DaVinci Resolve auf dem iPad intensiv in echten Projekten getestet – und zeige dir Schritt für Schritt, wie du das auch kannst. Ohne Technik-Frust. Ohne komplizierte Fachbegriffe.
Meine DaVinci Resolve iPad MasterClass und Final Cut Pro iPad MasterClass haben schon hunderten Anfängern geholfen – auch denen, die vorher noch nie geschnitten haben.